
Sometimes when we write code, it works correctly the first time we run it. If it doesn’t, maybe we can fix it because we recognize a silly mistake we might’ve made. However, there are many times where this will not be the case, and the answer isn’t easily found on Google. What do we do? We debug it, with all the tools we our offered.
Do note I will be using Visual Studio Community Edition for this, so while the IDE you’re using probably has these tools available, they may be located in different spots. There are different ways to debug different applications, some more complicated than others. We will be focusing mainly on using breakpoints.
Now when we talk about debugging with breakpoints and such, it’s not referring to syntax errors. We cannot even compile our program if we have those. We want to use debugging when the program runs, but the behavior is not what we’re trying to achieve.
Breakpoints
Breakpoints are one of the best debugging tools you have at your disposal. You can try to debug by printing values to console, which can definitely work, but eventually it can get tedious. So there’s a better method through breakpoints. They allow you to specify a spot in your code to stop and view what’s happening.
When you use a breakpoint you set the location to stop at, and once it reaches that point the program will stop and Visual Studio will give you lots of information about what’s going on in your program. You’ll be able to see values of variables, step through your code line by line to watch how values change and how your code runs.
Attach To Process
If you’re not using command prompt, and instead you’re using some engine or framework you may need to attach Visual Studios to that process. If you cannot just hit play from VS and have it run you’ll need to do this. For Unity it will say “Attach to Unity”, otherwise you can go the debug menu and hit “Attach to Process” and find your process from the list.
This Sounds Great, How Do I Use It?
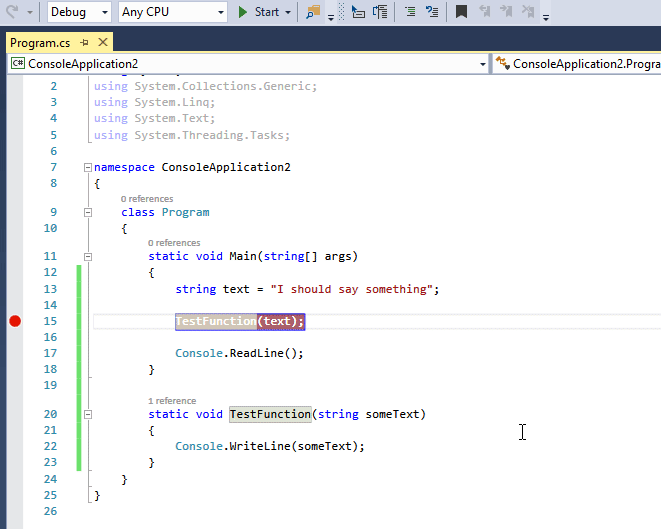
I’m glad you asked. There are a few ways you can add a breakpoint to a line in Visual Studios, when you do the relevant lines will be highlighted red and have a red circle on the left bar. Once the code actually hits the line (when you run the program) it will turn yellow for which line you’re currently on.
To add a breakpoint:
- With the default keybinds, click on the line you want to add the breakpoint, and hit F9.
- Click in the gray space on the far left of the line.
- Click on the line you want to add the breakpoint to, go to the debug button at the top, click “Toggle Breakpoint”
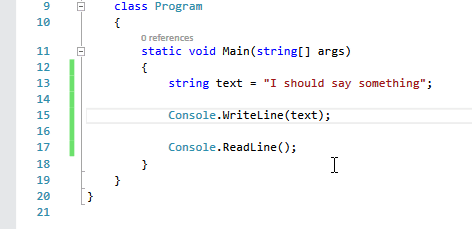
Once you’ve done this, the line should be highlighted red. Go ahead and run your program, once your program hits that line it should stop and Visual Studio should show up and have that line highlighted yellow. You have a few options here.
What Now?
Now that you’re stepping through your program, you can do several things. Have any variables? Hovering over them with your mouse will show you what that variables values are. This is invaluable for confirming information; you can also hit the pin icon next to a variables data to keep that data showing as long as you’re stepping through.
Do note you’ll only be able to see variables that exist within the scope your breakpoint is at currently.
Step Over
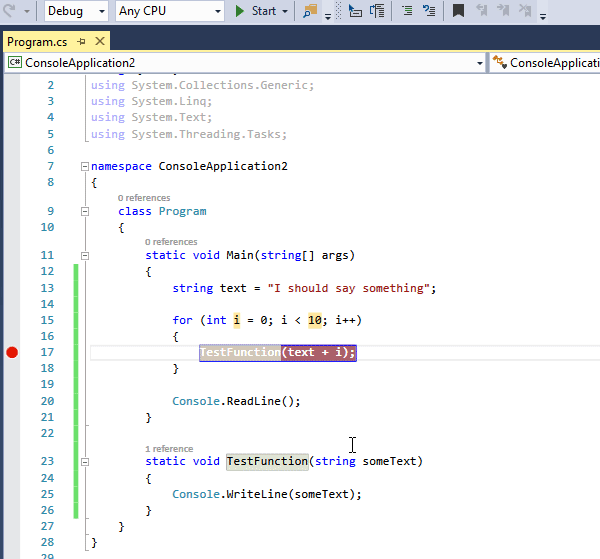
The next important step you can do is to step through the problem, the easiest way to do this is with the F10 key. Your program will then execute that line of code will progress to the next line. This is useful for moving down into a different scope, or when going through loops. If you hit this on a function it will skip over the function, and won’t go any deeper than the current scope.
If this doesn’t seem to be behaving properly, and it’s jumping all over the place, check to make sure you’re in debug mode and not release.
Step Into
This is very similar to step over, except it allows you to go a little deeper. If your breakpoint is over a function, hitting F11 (the step into key) will bring you into that function. and continue as normal.
Conditional Breakpoints
Breakpoints are great, but what if we have a very specific case we need to check, but it’s 200 loops into a for loop? We don’t wanna have to hit F10 200 times. What we can do is set a conditional breakpoint, it will only trigger in a specific scenario.
See the red circle that appears when we set a breakpoint? Right click on it and we’ll be given a ton of options. You’ll notice one for “Hit Count”, which we can set it to trigger once that line has been run a certain amount of times. You can also select “Condition” to straight up code a condition to stop at. So if we had a for loop, we could check i == 200 and it would stop once that statement was true.
Extra Practice
So here’s some code that will run, however it does not produce the correct results. It is your job to add some breakpoints and fix it!
Support
Are you having trouble with understanding this tutorial? Please feel free to contact me via email at KoseckCory@gmail.com or message me on discord at 7ark#8194.
I would love to get feedback from people so I can add and improve these tutorials overtime. Letting me know what you’re confused about will let me update the tutorials to be more concise and helpful.
If you’re interested in supporting me personally, you can follow me on Twitter or Instagram. If you want to support me financially, I have a Patreon and a Ko-fi.
1 comment on “Programming in C#: Debugging”Add yours →